Topics

Projections according to ISO 5456-3

By 4. August 2020December 2nd, 2020No Comments

Topics

Projections according to ISO 5456-3

2020-08-04

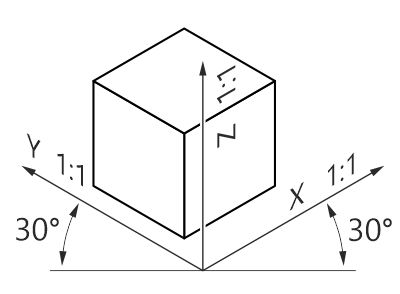
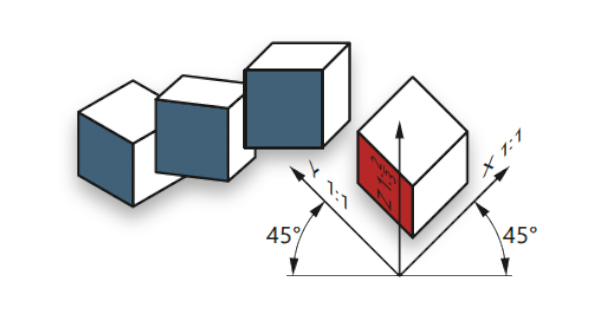
The projections according to ISO 5456-3 are simple images created by projecting the object to be illustrated from a point lying at infinity onto a projection plane, the drawing surface. All projections according to ISO 5456-3 are parallel perspectives.

Isometry

An isometry gives the same visual meaning to three sides of the object. The two opening angles of the projection are equal. All axes are unabbreviated.

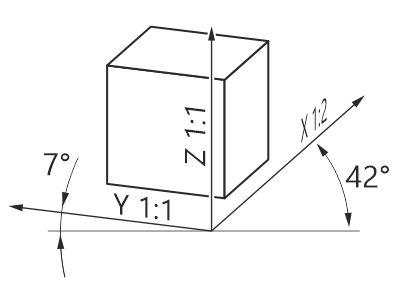
Dimetry

A dimetry highlights one side of the object. The two aperture angles of the projection have different sizes. The axis with the larger angle is shortened by half and thus recedes visually.

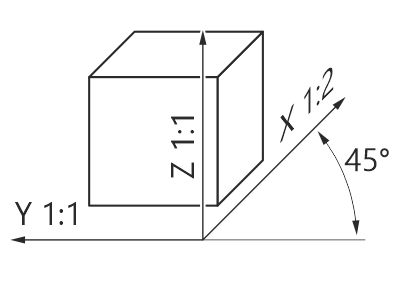
Cabinet

A cabinet projection also highlights one side of the object. The front view corresponds to the orthogonal view of the object and is thus visually in the center. An opening angle of the projection is 0°. The axis of the other opening angle is shortened by half.

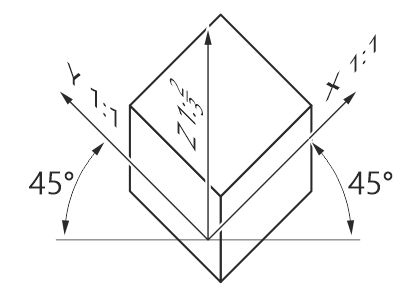
Planometry (shortened)

A planometry highlights the top side of an object. The two opening angles of the projection are equal. To avoid a too high impression of the object, the vertical axis is shortened to 2/3 in shortened planometry.